Using Custom Detail Fields for daily tasks
NetCrunch allows you to create views and folders dynamically, based on your settings, this article will show you how to create own views based on custom fields which may be added to any node.
NetCrunch allows for the easy creation of dynamic network views based on specific node characteristics. The Details Fields content can be related to the tasks that you need to perform regularly. You can also use it to automatically delegate the selected notifications to respective members of your team. You can add any data you need to the node or nodes by using the Details Fields to customize them to your needs.
What are Details Fields:
Details Fields are part of the Node Settings window (Properties tab), and they can include text, numerical values or a date. Some examples of Details Fields include Node Serial numbers, License Expiration dates, Service Expiration dates, Vendors, or the Person Responsible for the node. Based on this information, the user can create various views and view folders.
Displaying Detail Fields in the Node Settings:
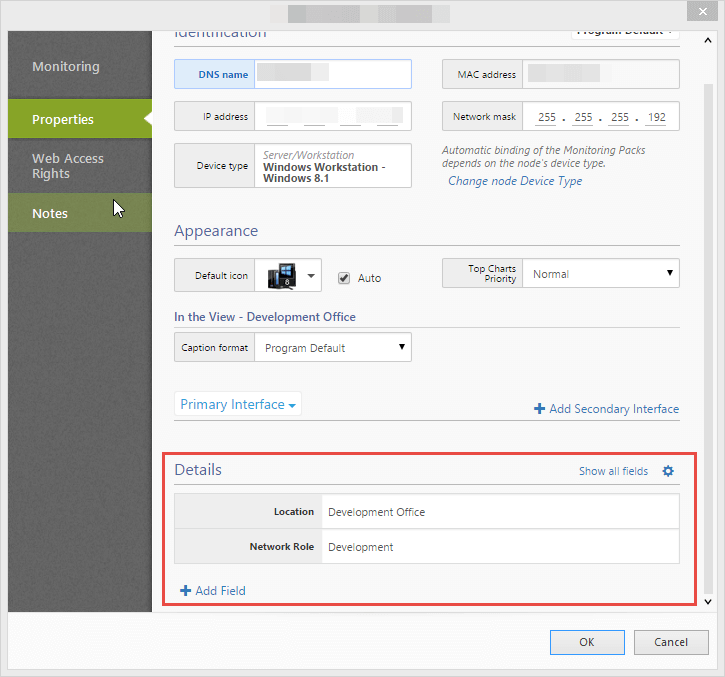
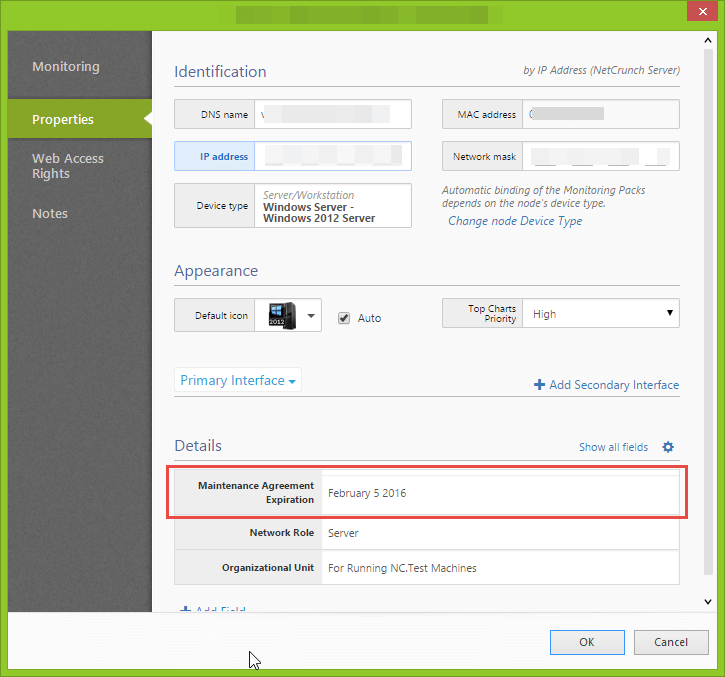
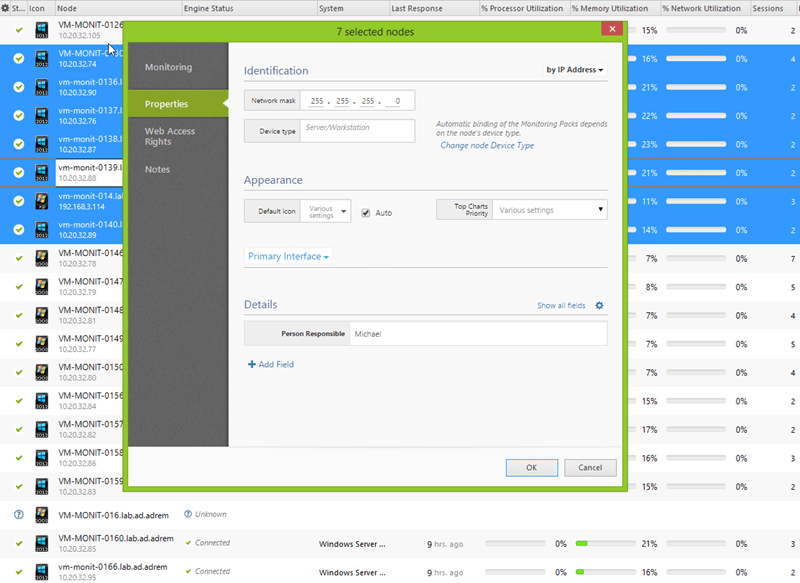
After a new Details field is added with the Default value entered, it will be visible on all nodes. If you do not enter a default value, the Field will be hidden - you will have to enter a specific value on selected nodes to make it visible on those nodes only. You can do this in two ways:
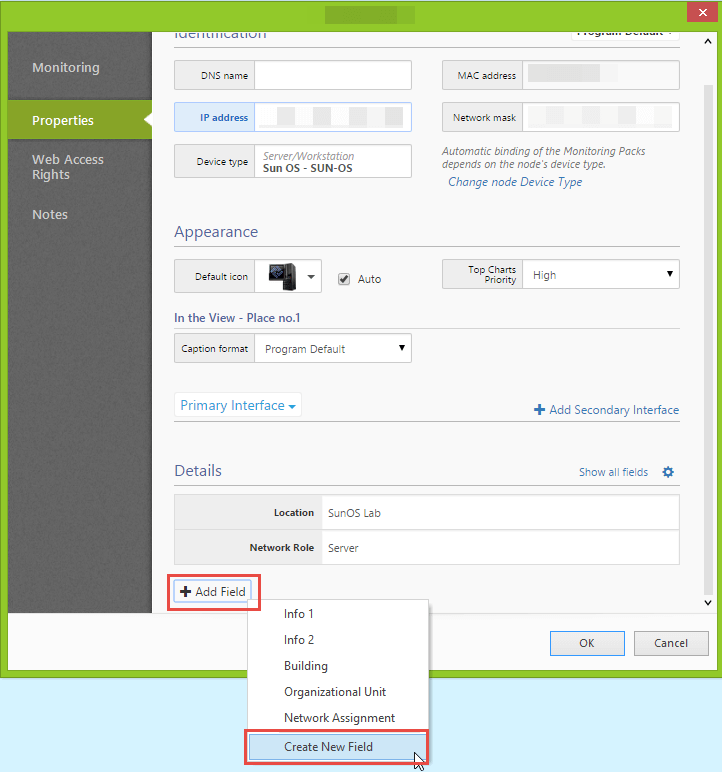
Go to the Node Settings windows, Properties tab
- click on Show All Fields (1), enter the value into the desired field, or
- click on Add Field (2) and select the field from the list - it will appear in the Details section.

Benefits of using Detail Fields:
By defining new Detail fields (or using already defined ones), NetCrunch can create automatic views based on Location, Operating System, Network Role, etc.
You can also create Dynamic Folders with views including groups of nodes with various values of the same Details Field (see an example described below).
Details Fields can be filled in with data automatically or manually.
For example, the Organizational Unit field can be automatically filled with data read from Active Directory - NetCrunch will create Folder with views for each value of data related to the Organizational Unit as it is set in the AD.
Defining new Details Fields:
There are three ways to define new Details Field on any node (each of them yields the same result).
-
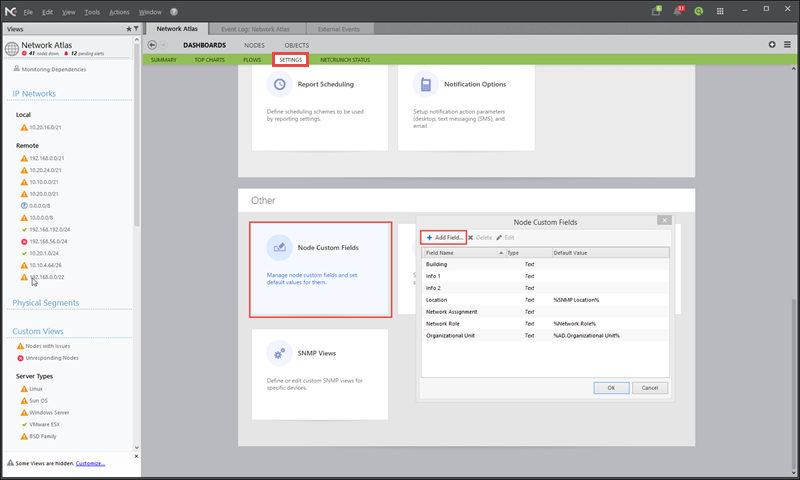
The Details Field can be defined in NetCrunch Settings: Select Network Atlas view, click on Settings, (scroll down if necessary). Click on the Node Custom Fields and select Add Field. This window allows you to modify or delete the fields.
-
The second way of defining the Details Fields is in the Node Settings window of any node. Switch to the Properties tab and click the Add Field button.
-
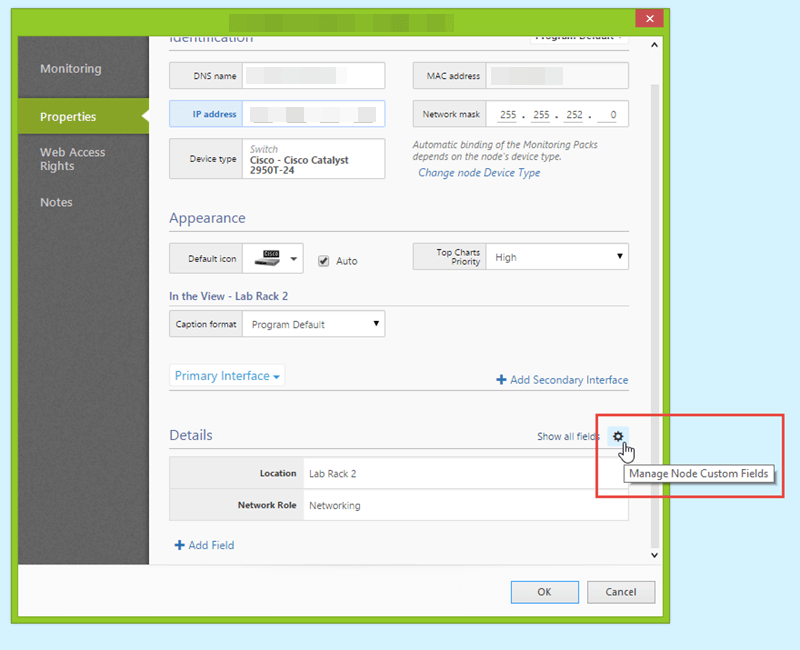
The Third way is similar to the previous one, but it also allows you to manage custom fields at the same time. In the Node Settings window, switch to Properties tab, click on the gear icon. New Custom Field can be added in the window that appears.
Node Custom Field Properties:
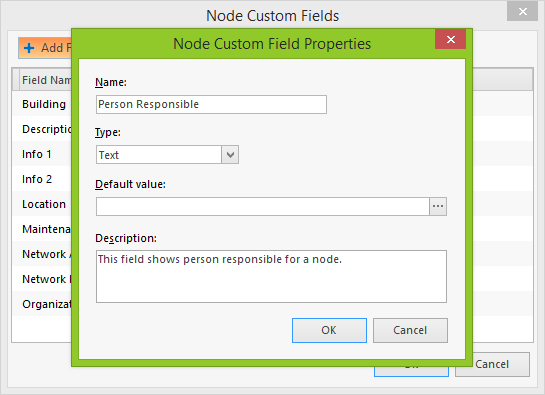
Here's the window that you need to fill in when defining a new Details Field:
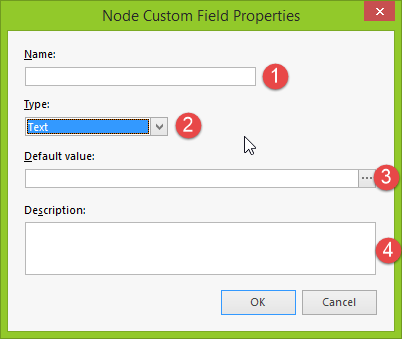
- Here you need to enter the name of the field.
- Choose the type of data for the field. There are three types available: Text, Number or Date.
- Default value: This field represents the value which will be displayed when nothing else is entered in the Field (if you leave it empty, the Field will remain hidden. To make the Field visible on selected nodes, you will have to later enter the specific values for this field for them).
- Description of the field (enter something that your junior team members will understand).
Example:
See how to create a new dynamic view in 5 easy steps: The view will include all nodes whose maintenance expires in less than 60 days.
-
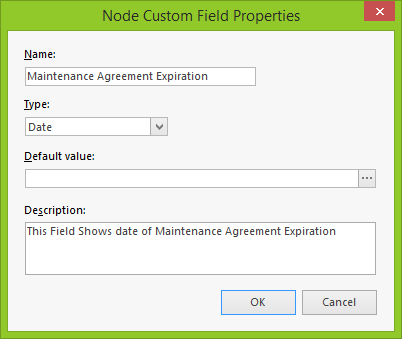
Define a new Custom Field in the NetCrunch Settings window (click on Network Atlas View, switch to Settings, scroll down and click on Node Custom Fields). Fill it with data as on the screen below:
-
Go to the Node Settings of the node where you want to enter the maintenance expiration date. Switch to the Properties tab, click on Add Field and select Maintenance. Type "February 5, 2016," in the Maintenance field. You can enter the same date for multiple nodes at once by selecting multiple nodes and opening the Node Settings window for them). Continue with entering respective maintenance expiration dates for other devices in your network - it may take a while but will save you a lot of time in the future.
-
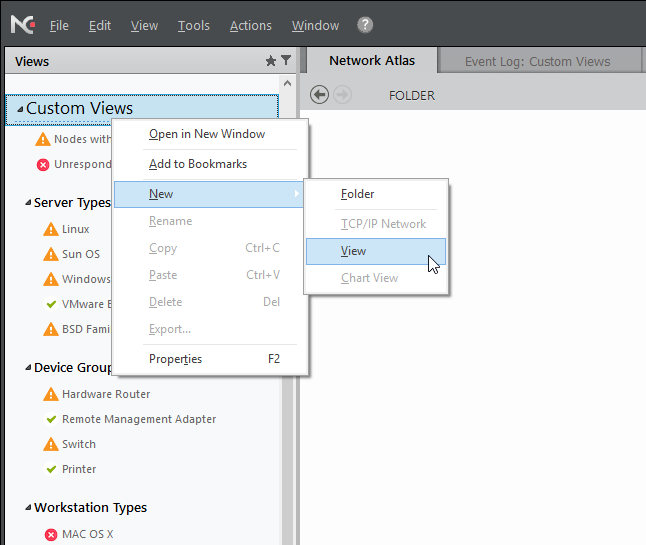
Right-Click on Custom Views, hover over New->View and select Dynamic View.
-
Enter the title of your view in the top box in the view. We want this view to display all nodes whose maintenance will expire in less than 60 days, so we add a title accordingly. Add the condition as presented on the screen. (Select Maintenance, add 'is less than' and type 60 days).
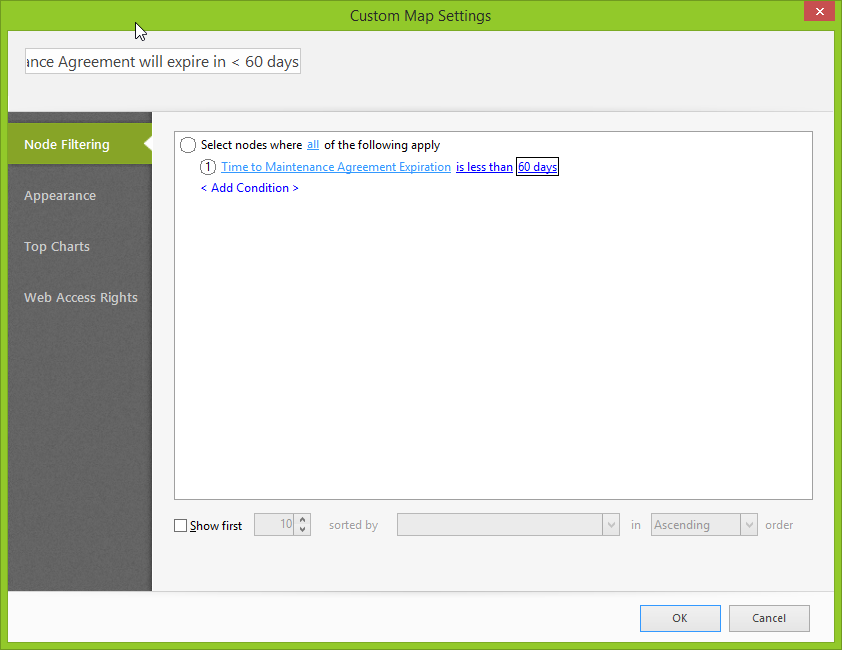
- After you set everything, save your map, and now all nodes that maintenance expires in less than 60 days should be on the map. No more manual checking - everything is dynamically refreshed here so you can request renewal quotes on time from the respective device suppliers.
When you renew the maintenance contract for the node, you need to change the maintenance expiration date for this node, and it will disappear from the custom view automatically.

Example of usage #2:
This Example will show you how to use Detail Fields to add the name of the person who is responsible for the administration of selected nodes. You will then use this field to create dynamic views and to manage notifications. In this way, the person responsible for those particular devices gets notified when their nodes have a problem.
- Define new Custom Field like shown on the screen:
-
Select one or multiple nodes where you want to add the Person Responsible field. Right-click and select the Node Settings, switch to Properties tab and add new field in the Details section- Person Responsible
-
Repeat these steps for nodes which have different Person Responsible entries.

-
Now we can create dynamic views for each Person Responsible. Right-Click on the Custom Views, hover over the New->Folder ->Dynamic Folder.
-
Enter the name of your Folder (in our case: Person Responsible for Nodes Groups based on your Custom Field information - like on the screen:
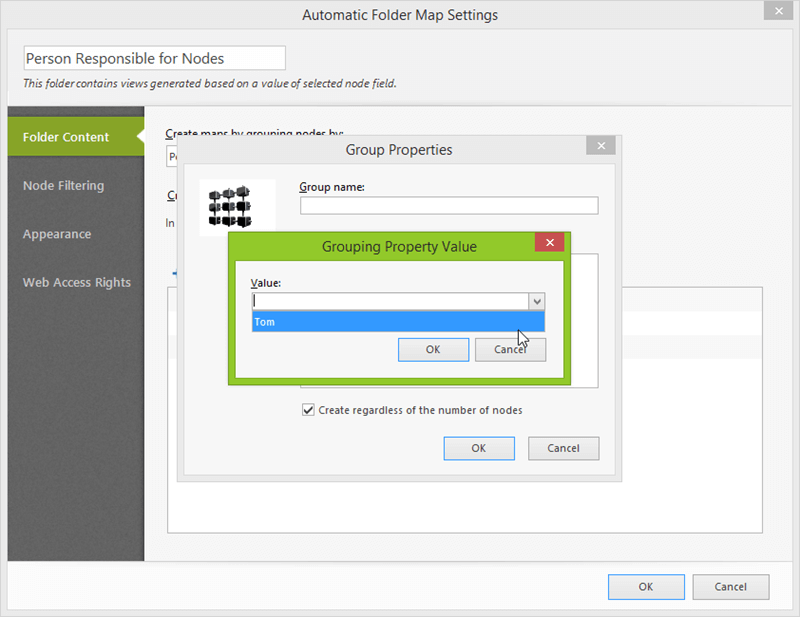 In the result, the window should look like this:
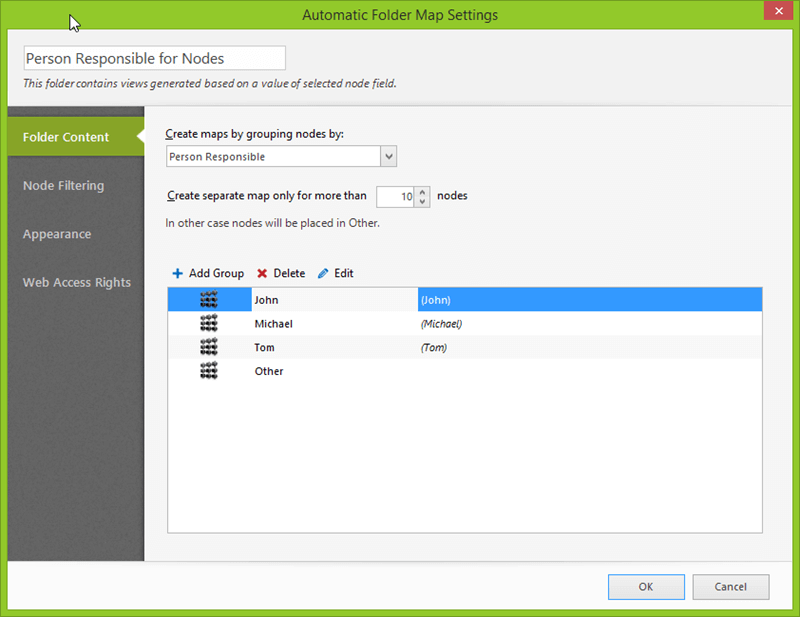
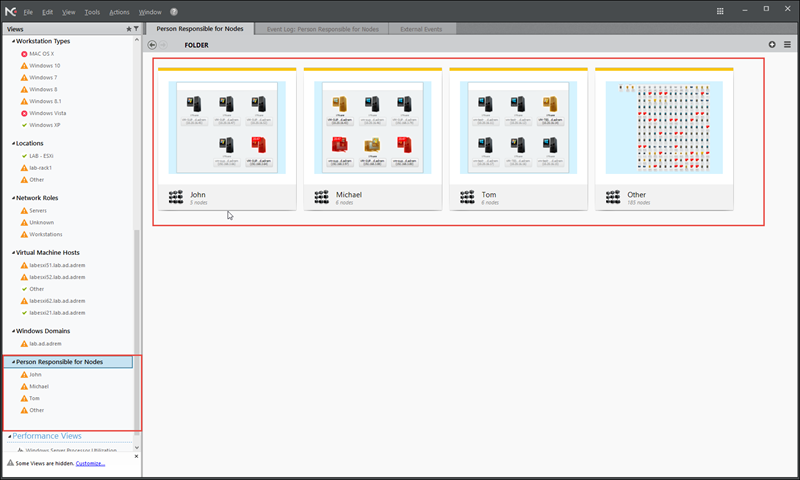
-
After you save the Folder, you can find it in the Views column. It contains three dynamic views, Tom, Michael, John and Others, which contain all the nodes that don't have a Custom Field Person Responsible filled with any information.
-
Now we will show you how to make set an alerting script so that the Person Responsible receives only alerts related to his nodes. The easiest way is to edit the default alerting script and add email actions for each Responsible Person.
-
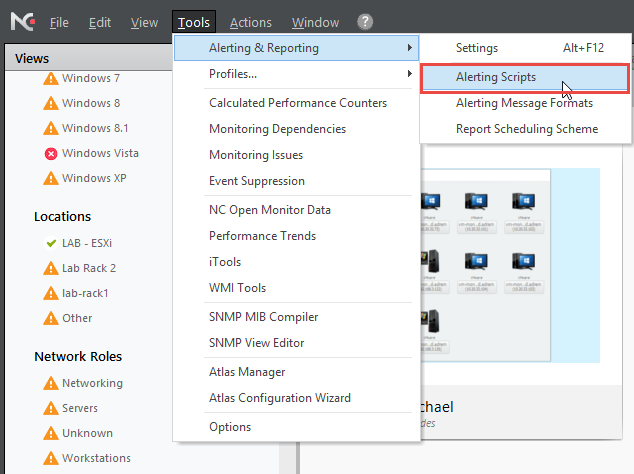
Go to Tools->Alerting & Reporting -> Alerting Scripts, click on Default and Edit
-
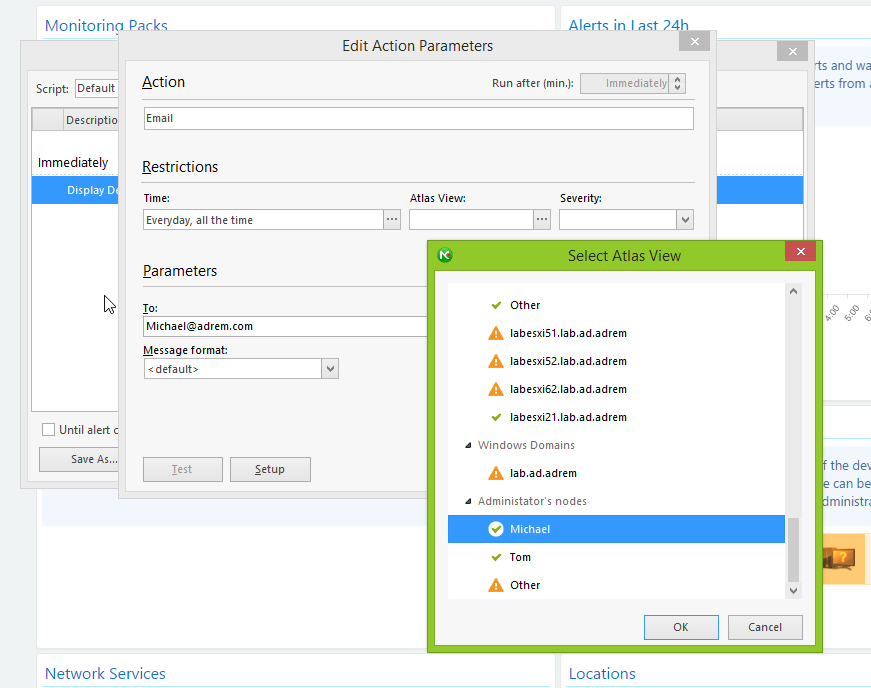
Add New Action to Run Immediately, select Email - Enter the Person Responsible email into the To field. Make sure that NetCrunch is set to send emails. (Use test button to check).
-
Next, set Restrictions to Atlas View - Click on [...] and Select View of Person Responsible. Save action.
-
Add a new action and repeat steps 9 and 10 for every Person Responsible.
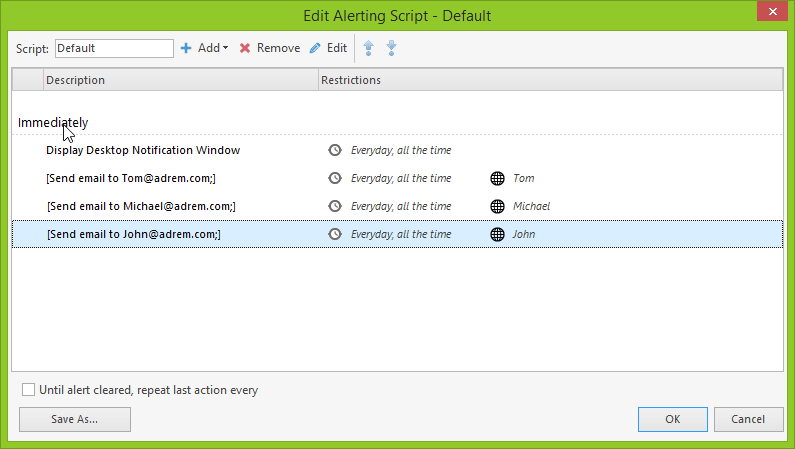
After everything is set, network administrators will receive emails about the alerts that are generated by nodes which are linked to them via Details Field. Please keep in mind, that all nodes located on "Others" map will execute only Default Action which is set to work on all views (By Default Display Notification Window)